Saving Search Criteria for a Future Search
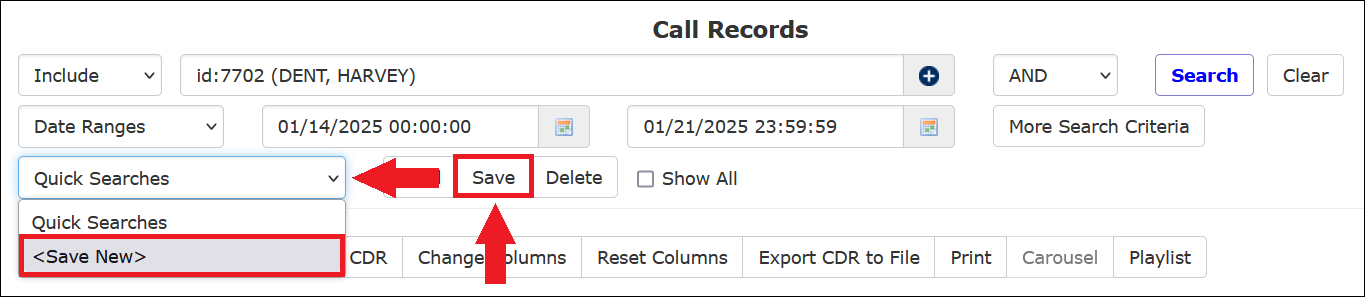
After you have set up a specific set of search criteria for a Call Records search, you can save the criteria for a future search by clicking <Save New> in the Quick Searches box or by clicking Save.
You can then select the same search criteria for a future call search without re-entering the criteria you specified.
After you use one of the options to begin the process, The ENFORCER® displays the Save This Search dialog box, which includes the details about your search in the Details pane, as shown on the left in the following example.


In the above example shown on the right, the user named the search, selected it for use by other users, and clicked Save.
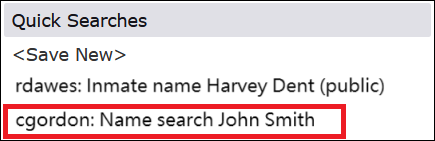
After the search has been saved, it will be accessible from the Quick Searches dropdown list, as shown in the following example. The search name is preceded by The ENFORCER® user ID of the person who created it and also displays (public) if the search was made available to other users.

When you return later and perform a Call Records search by selecting a saved search and clicking Load, the search is loaded for the same date range you saved from the original search. To search for a different date range, you must specify a new start date/time and end date/time before you click Search.
How to save a Call Records Search
- Perform a Call Records search based on desired criteria.
- Click <Save New> in the Quick Searches box, or click Save.
- In the Save This Search dialog box, enter a meaningful name for the saved criteria in the Name field. Be sure to include any information, such as an inmate’s ID or name, which may help to identify the saved criteria to other ENFORCER® users.
- To make the search criteria available to other ENFORCER® users, select the Make this search public checkbox.
In theSave This Searchdialog box, click Save . The new search criteria name is added to the Quick Searches dropdown list and preceded by the username of the person who created it. If you click the Make this search public checkbox, the search name will be displayed to other users. If you do not click this checkbox, it will only display to you.
The following example shows a Quick Searches dropdown list of all saved searches. For one of the saved searches in this list, the user named rdawes selected the Make this search public checkbox when the inmate name Harvey Dent search was created. However, the user cgordon did not elect to make the inmate name John Smith search public, so users other than cgordon cannot view the saved search.
How to use a saved Call Records search
- Click Call Records under the Call Detail tab.
- Select the desired search name from the Quick Searches dropdown list.
- Click Load to load the search criteria for the selected search name.
When you select a saved search and click Load, the search is loaded for the same date range that you saved from the original search. To search for a different date range, you must specify a new start date/time and end date/time before you click Search.
- Click Search. The ENFORCER® displays the search results.
How to edit and save an existing Call Records search
- Click Call Records under the Call Detail tab.
- Select the desired search name from the Quick Searches dropdown list.

- Click Load.

- Add or edit any desired search criteria on the Call Records search page.
- Click Save. The Update Saved Search dialog box is displayed and lists any added or changed search criteria, as shown in the following example.

- Select the Confirm: Replace existing search checkbox. Optionally, you can change whether other users can use the search by clicking or unclicking the Make this search public checkbox.

- In the Update Saved Search dialog box, click Save. The search is saved under the same name but with the modified criteria.